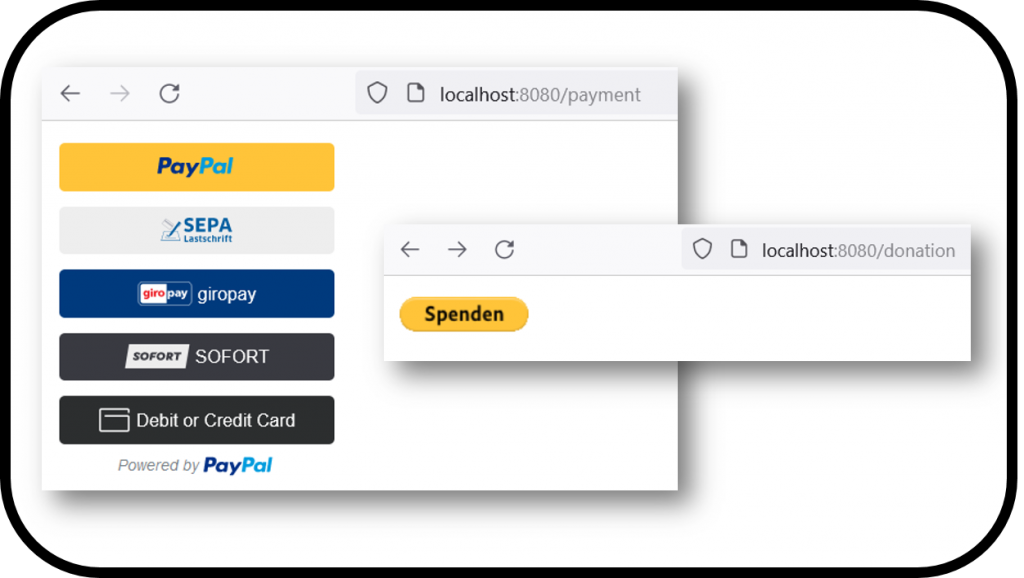
Vaadin 24 Paypal Components

I recently published a package with two components I wrote for vaadin 24, namely a paypal integration for donations and payments. Searching for the right plattform for announcements and sales I have chosen patreon since I already run a campagne there and it contains all options I needed.

To push the visibility, I am writing a short article here. Hope it helps somewhere!

https://www.patreon.com/padmalcom/shop/vaadin-24-paypal-components-donations-149436

Setup Nvidia Jetson AGX Xavier

Setting up Nvidia Jetson products is neither comfortable nor easy. I struggled the last weekend to get my AGX Xavier up and running and found that many other had and have problems to use the Nvidia SDK Manager correctly.

Here are the neccessary information for you to succeed:

  • You need Ubuntu 18.04.5 LTS Desktop, even though Ubuntu 20.04 is officially supported, it does not work with the AGX Xavier.
  • You can write the Ubuntu ISO image to a USB flash drive and use the Try Ubuntu feature, a full installation is not necessary (even if the Nvidia guys say so). But: You need a possibility to store ~40 GB of data which is downloaded by the SDK manager. Use a second flash drive.
  • When you boot Ubuntu 18 from a flash drive you have to activate the universe repository by executing sudo add-apt-repository universe When you do a full install of Ubuntu, the repository is installed automatically.
  • Now connect the Jetson via USB to your PC and switch it on by connecting the power cable and push the left button.
  • Install the SDK Manager. When Ubuntu says it cannot install the tool because some dependencies are not installable, you missed adding the universe repository.
  • When you start the SDK Manager the tool will show you that the AGX Xavier is connected. In case that the tool says that your current OS is not supported or that there are no versions supporting your OS you did not boot Ubuntu 18.04.5 (it happend to me using CentOS 7, CentOS 8 and Ubuntu 20.04)
  • The SDK Manager will download the required files. You might have to switch the download directory. The installation will follow.
  • After flashing the OS you will see a promt asking for an IP, a user name and a password. You now have to connect keyboard, mouse and monitor to your Jetson. On this monitor you will see that the Jetson will configure the installation. You have to enter a user name and a password that you will have to enter on your host pc (the Ubuntu 18.04).
  • It can happen (at least it happend to me and to many more other users on the net) that the Jetson does not boot but shows the Nvidia logo over and over again. I had no other option but removing the sd card and delete all partitions on it and then flash the Jetson again.
  • When you configured the Jetson correctly, the SDK Manager will continue to install the SDK on the OS. When it is done, your Jetson is ready to use.

Entwicklung eines KI-gestützten Sprachassistenten in Python

Hallo zusammen, falls ihr schon mal mit dem Gedanken gespielt habt eine eigene Alexa oder Cortana zu entwickeln, möchte ich euch meinen Kurs “Entwicklung eines KI-gestützten Sprachassistenten in Python” empfehlen. Dabei geht es darum von Grund auf ein System zu entwickeln, dass Sprache und Wünsche eines Menschen versteht und eine entsprechende Antwort oder Aktion generiert.

Der Inhalt ist so aufgebaut:

  • Aufsetzen einer Entwicklungsumgebung in Python
  • Sprachverständnis und -synthese
  • Implementierung einer Konfiguration der Anwendung
  • Erstellen eines Intent (Skill) Systems
  • Dynamisches Laden von Intents zur Laufzeit
  • Implementierung von 10 Beispiel-Intents
  • Eine einfache UI entwickeln
  • Build und Paketieren der Anwendung als Binary und Installer

Für jedes Kapitel stelle ich funktionierenden Quelltext bereit, an dem ihr euch orientieren könnt. Ich freue mich drauf den ein oder anderen hier wiederzusehen 🙂

https://www.udemy.com/course/ki-sprachassistent/

[Unity] Call Unity FBX Exporter from C# code

Unity offers a free plugin to export meshes as fbx files from the editor. Yesterday, I tried to find out how to call the export function from code. Finally, I got it running but not during runtime but only from an editor script.

FbxExporters.Editor.ConvertToModel.Convert(target.gameObject, null, savePath, null, null, null);

Whereever, you include this line of code make sure it is in a folder called Editor. Otherwise the class FbxExporters.Editor won’t be visible. Unfortunately, there remains a limitation. You can only write your fbx files to the Assets folder and not to an arbitrary folder on your hard drive. If you figure out how to solve this, please tell me 🙂

Export Jupyter Notebook as Tex on CentOS

Today I tried to figure out how to print a Jupyter Notebook as Tex file including all images on a CentOS 7 installation. After a while I found the following packages which are required to succesfully generate the files:

yum -y install texlive texlive-latex texlive-xetex
yum -y install texlive-collection-latex
yum -y install texlive-collection-latexrecommended
yum -y install texlive-xetex-def
yum -y install texlive-collection-xetex
yum -y install texlive-collection-latexextra
yum -y install texlive-adjustbox
yum -y install texlive-upquote

After that, just call:

pdflatex mytex.tex

Building OpenCV 3.4 on Raspberry Pi

I’ve read many tutorials about building and installing OpenCV on a Raspberry Pi but they either did not work or were outdated. Hence, I decided to write down all steps required to build and install OpenCV 3.4.

 
# Update your system
sudo rpi-update
sudo apt-get update
sudo apt-get upgrade
 
# Change swap size
sudo nano /etc/dphys-swapfile
# Change this... CONF_SWAPSIZE=100 to this
CONF_SWAPSIZE=1024
 
# Restart service
sudo /etc/init.d/dphys-swapfile stop
sudo /etc/init.d/dphys-swapfile start
 
# Install packages
sudo apt-get install build-essential cmake cmake-curses-gui pkg-config
sudo apt-get install libatlas-base-dev gfortran
sudo apt-get install \
  libjpeg-dev \
  libtiff5-dev \
  libjasper-dev \
  libpng12-dev \
  libavcodec-dev \
  libavformat-dev \
  libswscale-dev \
  libeigen3-dev \
  libxvidcore-dev \
  libx264-dev \
  libgtk2.0-dev
 
sudo apt-get -y install libv4l-dev v4l-utils
 
sudo apt-get install python2.7-dev
sudo apt-get install python3-dev
 
pip install numpy
pip3 install numpy
 
# Install OpenCV
wget https://github.com/opencv/opencv/archive/3.4.0.zip -O opencv.zip
wget https://github.com/opencv/opencv_contrib/archive/3.4.0.zip -O opencv_contrib.zip
 
unzip opencv.zip
unzip opencv_contrib.zip
 
cd opencv-3.4.0
mkdir build
cd build
 
sudo cmake -D CMAKE_BUILD_TYPE=RELEASE \
    -D CMAKE_INSTALL_PREFIX=/usr/local \
    -D BUILD_WITH_DEBUG_INFO=OFF \
    -D BUILD_DOCS=OFF \
    -D BUILD_EXAMPLES=OFF \
    -D BUILD_TESTS=OFF \
    -D BUILD_opencv_ts=OFF \
    -D BUILD_PERF_TESTS=OFF \
    -D INSTALL_C_EXAMPLES=OFF \
    -D INSTALL_PYTHON_EXAMPLES=ON \
    -D OPENCV_EXTRA_MODULES_PATH=../../opencv_contrib-3.4.0/modules \
    -D ENABLE_NEON=ON \
    -D WITH_LIBV4L=ON \
        ..
 
sudo make -j3
sudo make install
sudo ldconfig
 
# Fix library file name
cd /usr/local/lib/python3.5/dist-packages/
sudo mv cv2.cpython-35m.so cv2.so

Quickly executing multiple hbase commands from shell

We tend to setup our hbase test tables by shell scripts. Hence we have to execute multiple puts and deletes in a row. When you add an hbase shell [command] for each single operation you will have to wait a long time until all commands are processed. A more performant proceeding is to put all commands in one single <<EOF … EOF construct which basically allows to pass a multi line parameter to the shell.

hbase shell <<EOF
put 'shared:ITEMS','item0001','c:value','1.0'
put 'shared:ITEMS','item0002','c:value','2.0'
put 'shared:ITEMS','item0003','c:value','3.0'
put 'shared:ITEMS','item0004','c:value','4.0'
put 'shared:ITEMS','item0005','c:value','5.0'
put 'shared:ITEMS','item0006','c:value','6.0'
EOF

Doing so hbase will only start one shell instead of starting an instance for each single command.

Compiling the Alize speaker detection library in Visual Studio 2015

To compile the ALIZE speaker detection library download the projects alize-core and LIA_RAL from https://github.com/ALIZE-Speaker-Recognition. Unzip both in the same parent directory and rename the alize-core folder to ALIZE.

Open the SLN file in the ALIZE directory and build it, there should be no errors.

Afterwards open the SLN file in the LIA_RAL folder. Before you start the build process you have to make changes to two files. In Macros.h change line 301 from:

#if defined(_MSC_VER) && (!defined(__INTEL_COMPILER))

to:

#if defined(_MSC_VER) && (_MSC_VER < 1900) && (!defined(__INTEL_COMPILER))

Then change the following in MapBase.h. Add the following line after line 172 (before the keyword public:):

typedef MapBase<Derived, ReadOnlyAccessors> ReadOnlyMapBase;

Afterwards, change the following line:

Base::Base::operator=(other);

to:

ReadOnlyMapBase::Base::operator=(other);

And a few lines later change:

using Base::operator=;

to:

using ReadOnlyMapBase::Base::operator=;

Now open the SLN file in the LIA_RAL folder and build the project liatools. Make sure that you pick the same platform as you did before when compiling ALIZE.